
Cookie Dough Fudge Pops
Tiffany Hill
50 square pops
Dessert
Here’s what you’ll need:
Silicone Square Pans : to pour/set the fudge.
Packaging: I use these 4 x6 bags or these clear twist tie bags.
Sticker: I use the Cookie Dough Fudge Pop Sticker.
Popsicle Sticks: I use 4.5 inch
Optional: Mini Hand Massager
Ingredient Back Label: Please see my thermal label guide/templates.
See video demonstration for reference for single packaging.
See video demonstration for multi-packs.
Suggested Selling Price: $2-$3 per fudge pop. Please see my pricing formula here.
Ingredients
- 3 1/4 cups sugar (650 g)
- 1 cup butter (226 g)
- ¾ cup half & half (180 g)
- 8 oz marshmallow fluff (226 g)
- 14 oz white chocolate (400 g)
1 tsp vanilla
1 tsp cookie dough flavoring
- pinch of salt
blank
30 oz. white chocolate wafers or almond bark
50 Popsicle Sticks
blank
*You will have enough left over from the 30 oz. above.
¼-½ cup mini chocolate chips
Directions
blank
- In a heavy saucepan combine sugar, butter, and half and half
- Cook over medium, stirring often, to 234°F / 112°C (soft ball stage). Use a candy thermometer and do not exceed 236°F to prevent crumbly texture.
- Remove from heat immediately.
blank
Add marshmallow fluff, white chocolate, vanilla, cookie dough flavoring, and a pinch of salt to saucepan.
- Stir in until silky.
blank
Pour the entire batch of warm fudge into the silicone pan. You do not need to spray it with baking spray or use parchment.
Tap pan firmly on counter to level.
- Let set 8–10 hours at room temp or refrigerate for 90 minutes or flash freeze for 30 minutes.
blank
Note: I now make my fudge pops square instead of rectangular. If you choose a rectangular shape, this recipe will yield about half as many.
Remove the slab of fudge from the silicone pan and place on a piece of parchment paper.
Using a sharp knife, make horizontal cuts across the entire slab every 5/8 inch.
Tip: The fudge slices best with a hot knife. I dip my knife in hot water every few cuts, then wipe it dry with a paper towel before continuing.
Next, make vertical cuts across the entire slab every 1.6 inches to create the individual, rectangular fudge pops.
Once all of the fudge pops have been sliced, stand each one upright and insert a popsicle stick into the top. If a fudge pop cracks or splits while inserting the stick, don't worry. Simply use a gloved hand to gently press it back into shape.
You should end up with approximately 50 fudge pops measuring about 1.6 inches wide, 2 inches tall, and 5/8 inch thick.
blank
In a tall container (I use a deli container, tall silicone measuring cup, or tall coffee mug), melt 30 ounces of white chocolate in the microwave in 30-second intervals, stirring between each interval until smooth.
Once the chocolate is fully melted, use a candy thermometer to check the temperature. For the best results, the chocolate should be approximately 100°F before dipping.
Hold each fudge pop by the stick and dip it into the melted chocolate. Gently shake off the excess chocolate, or use a hand massager against the stick for 10–15 seconds to help remove the excess coating.
Note: Fudge pops may occasionally crack down the center when inserting the popsicle stick. If this happens, simply use a gloved hand to gently press the fudge back together before dipping. You can also turn the fudge pop around and use the uncracked side as the front. If you dip a cracked fudge pop, the chocolate coating will likely crack as well. Fortunately, the fudge is very soft and easy to reshape.
Once dipped, place the fudge pop flat on a sheet of parchment paper with the back side facing down. Do not stand it upright.
Allow the chocolate to set on all dipped fudge pops.
blank
If needed, reheat the remaining chocolate.
Transfer to a piping bag and snip a small tip.
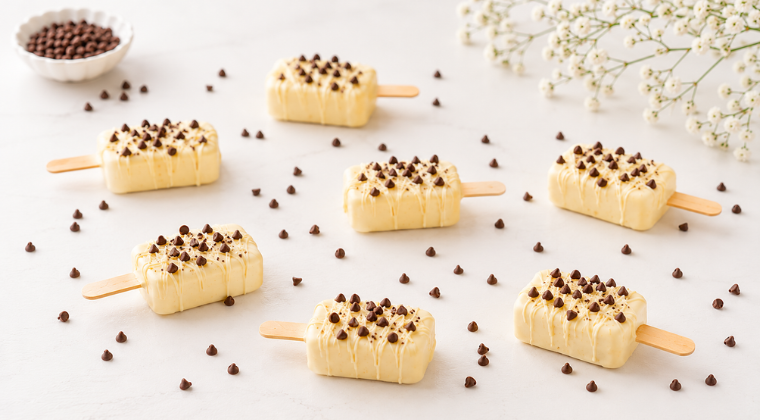
Lightly drizzle over each fudge pop.
Drizzle 6–8 fudge pops at a time, then immediately top them with mini chocolate chips before moving on to the next batch. This prevents the drizzle from setting before the toppings have a chance to stick.
blank
I package my fudge pops in these 4 x6 bags or these clear twist tie bags and label with these stickers. You can also see my packaging video here.
If you need an ingredient label for the back, please see my thermal label guide/templates.